In this article, we explore the innovative implementation of VMware's ESXi ARM on the Raspberry Pi 5. The focus is on setting up ESXi ARM on the Raspberry Pi 5, which was initially challenged by a lack of UEFI support. This obstacle is surmounted by Mario Bălănică's development of a Raspberry Pi 5-specific UEFI bios. The setup process is detailed, emphasizing the necessity of an external USB network adapter, and the steps from microSD card preparation to management network configuration.
In 2018, Pat Gelsinger, then CEO of VMware, made a groundbreaking announcement at the VMworld keynote presentation in Las Vegas, revealing the ability to operate ESXi on a Raspberry Pi. Following the presentation, I connected with Alexander Fainkichen, a pivotal contributor to the initiative, for a sit-down interview. As a presenter for VMworld TV at a time when edge computing was surging in popularity, I had the opportunity to delve into the subject. The full interview remains accessible on VMware’s Explore channel.
‘Back at Vegas, people asked us in jest whether the Pi could ever run ESX. We decided it was worth showing that it is possible. ESX on Pi is a promise that VMware understands that the Edge includes extremely low end devices as well. Scaling with the workload and envo is important!’
I recently acquired the cutting-edge Raspberry Pi 5, aiming to set up ESXi ARM. It was tailored for the Raspberry Pi 4, but initial attempts to operate it on the Raspberry Pi 5 were met with a challenge due to the absence of UEFI support.
 However, this scenario changed about a week back when Mario Bălănică, associated with the Windows on Raspberry (WoR) project, unveiled a UEFI bios specially designed for the Raspberry Pi 5. This critical development has enabled the device to install ESXi ARM.
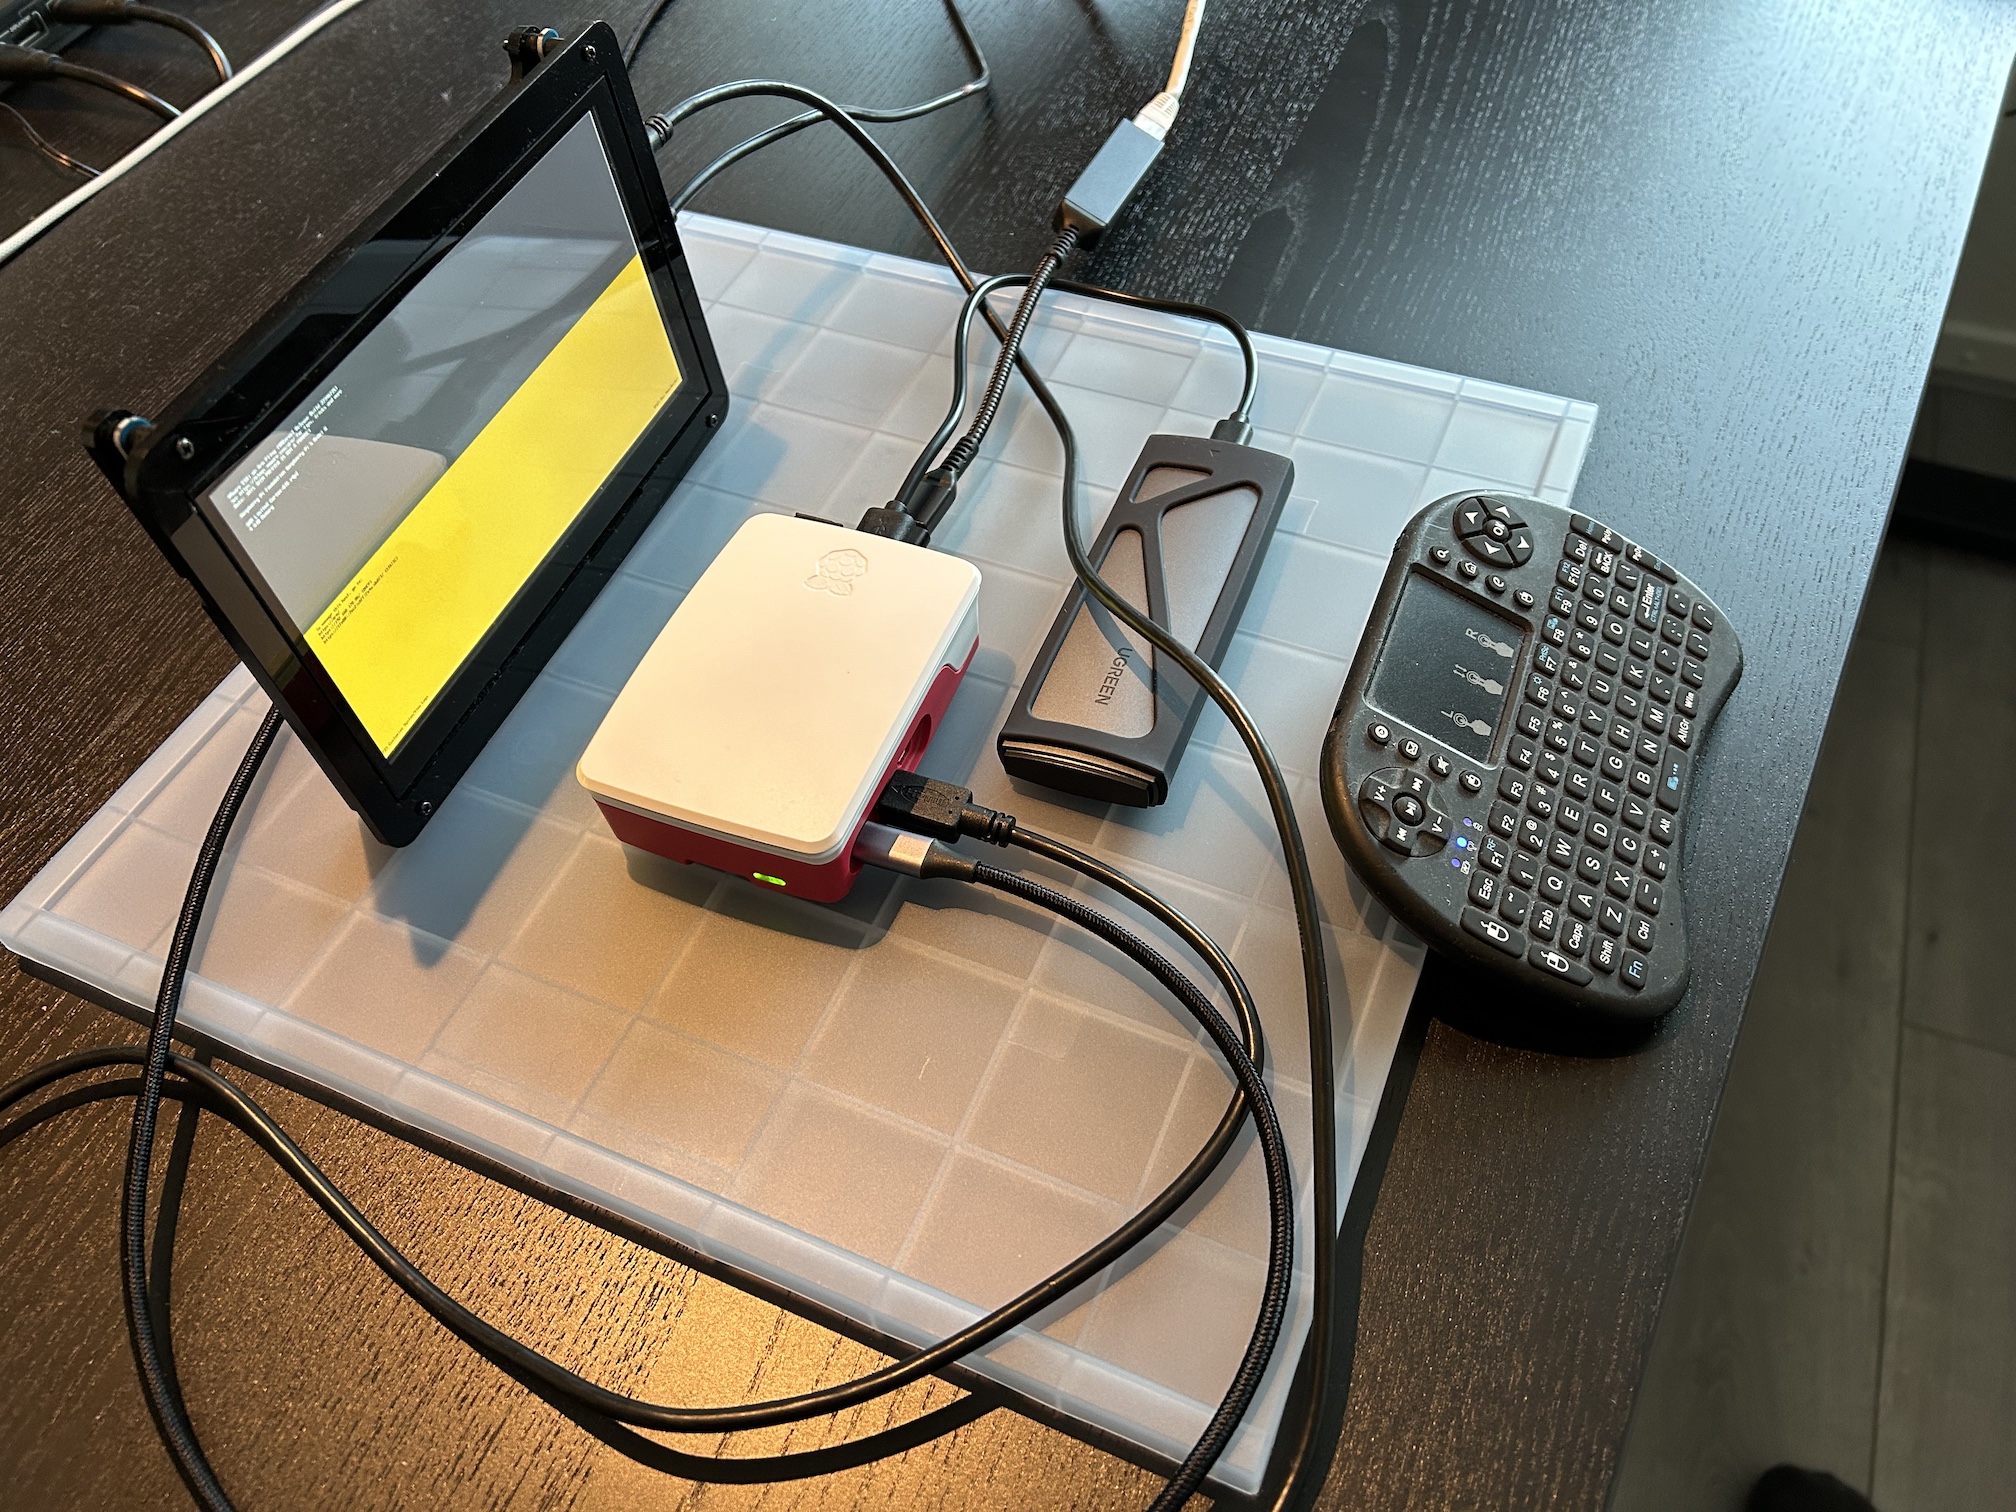
Before proceeding, it's important to note a few prerequisites. The Raspberry Pi 5's built-in network adapter is marked an unsupported UEFI peripheral, necessitating the use of an external USB network adapter. For my setup, I chose the Maxonar USB C Ethernet Adapter, which offers reliable Gigabit LAN connectivity.
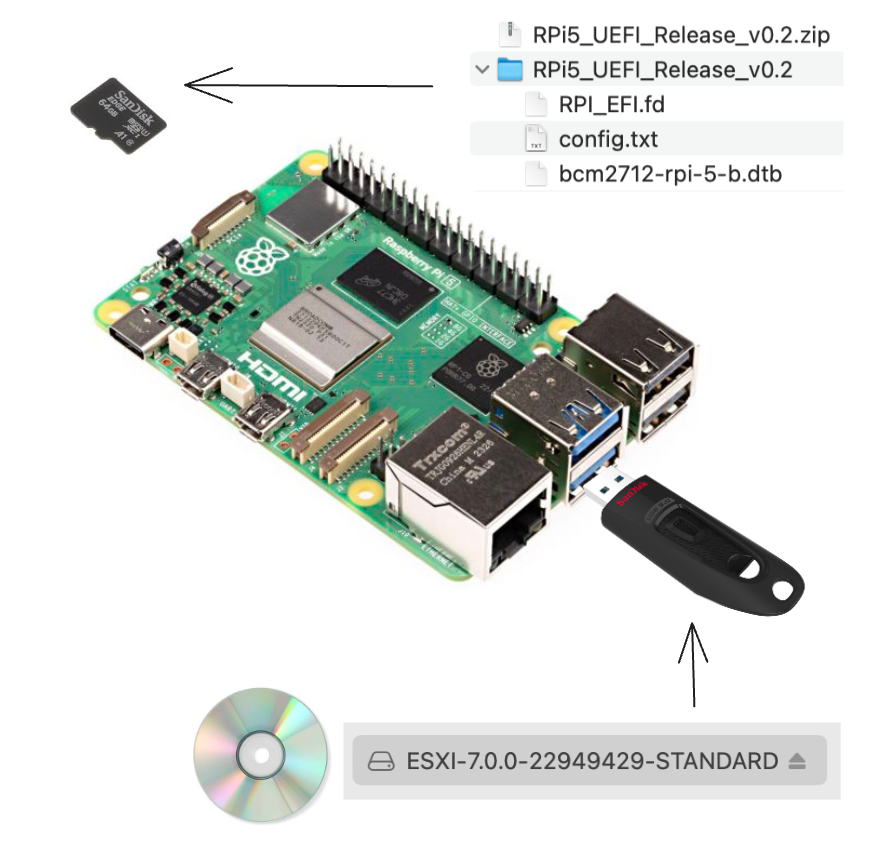
The installation procedure is quite direct. Begin by copying the UEFI files onto a microSD card formatted to FAT32. Next, transfer the ISO contents of the ESXi ARM installer onto a FAT32-compliant USB drive. Once you power up the Raspberry Pi, the installation should initiate on its own.
During my initial setup, the installation paused at 81%, hindered by the lack of a network adapter for the management network. This hiccup is overcome on the first reboot, where the USB network adapter is recognized, allowing the configuration of the management network thereafter.

The storage setup utilizes a USB interface, connecting through a robust "UGREEN M.2 Adapter NVMe SSD Hard Drive Enclosure" which houses a swift "Samsung SSD 256GB PM991 M.2 2242 42mm PCIe 3.0 x4 NVMe" drive. This USB drive plays a triple role: it's the install-boot media, the destination for the ESXi install, and the local storage for VMFS (Virtual Machine File System). You can leave it inserted after the installation completes. In future enhancements, I plan to integrate the Samsung SSD into my setup more seamlessly, using the PineBerry m.2 HATDrive, interfaced via NVMe.
In this video, I've captured the entire installation process from beginning to end, and it takes just 5 minutes to complete. The recording was done using a Video Capture Card, a Guermok USB 3.0 HDMI to USB C Audio Capture Card, and QuickTime on a Mac.
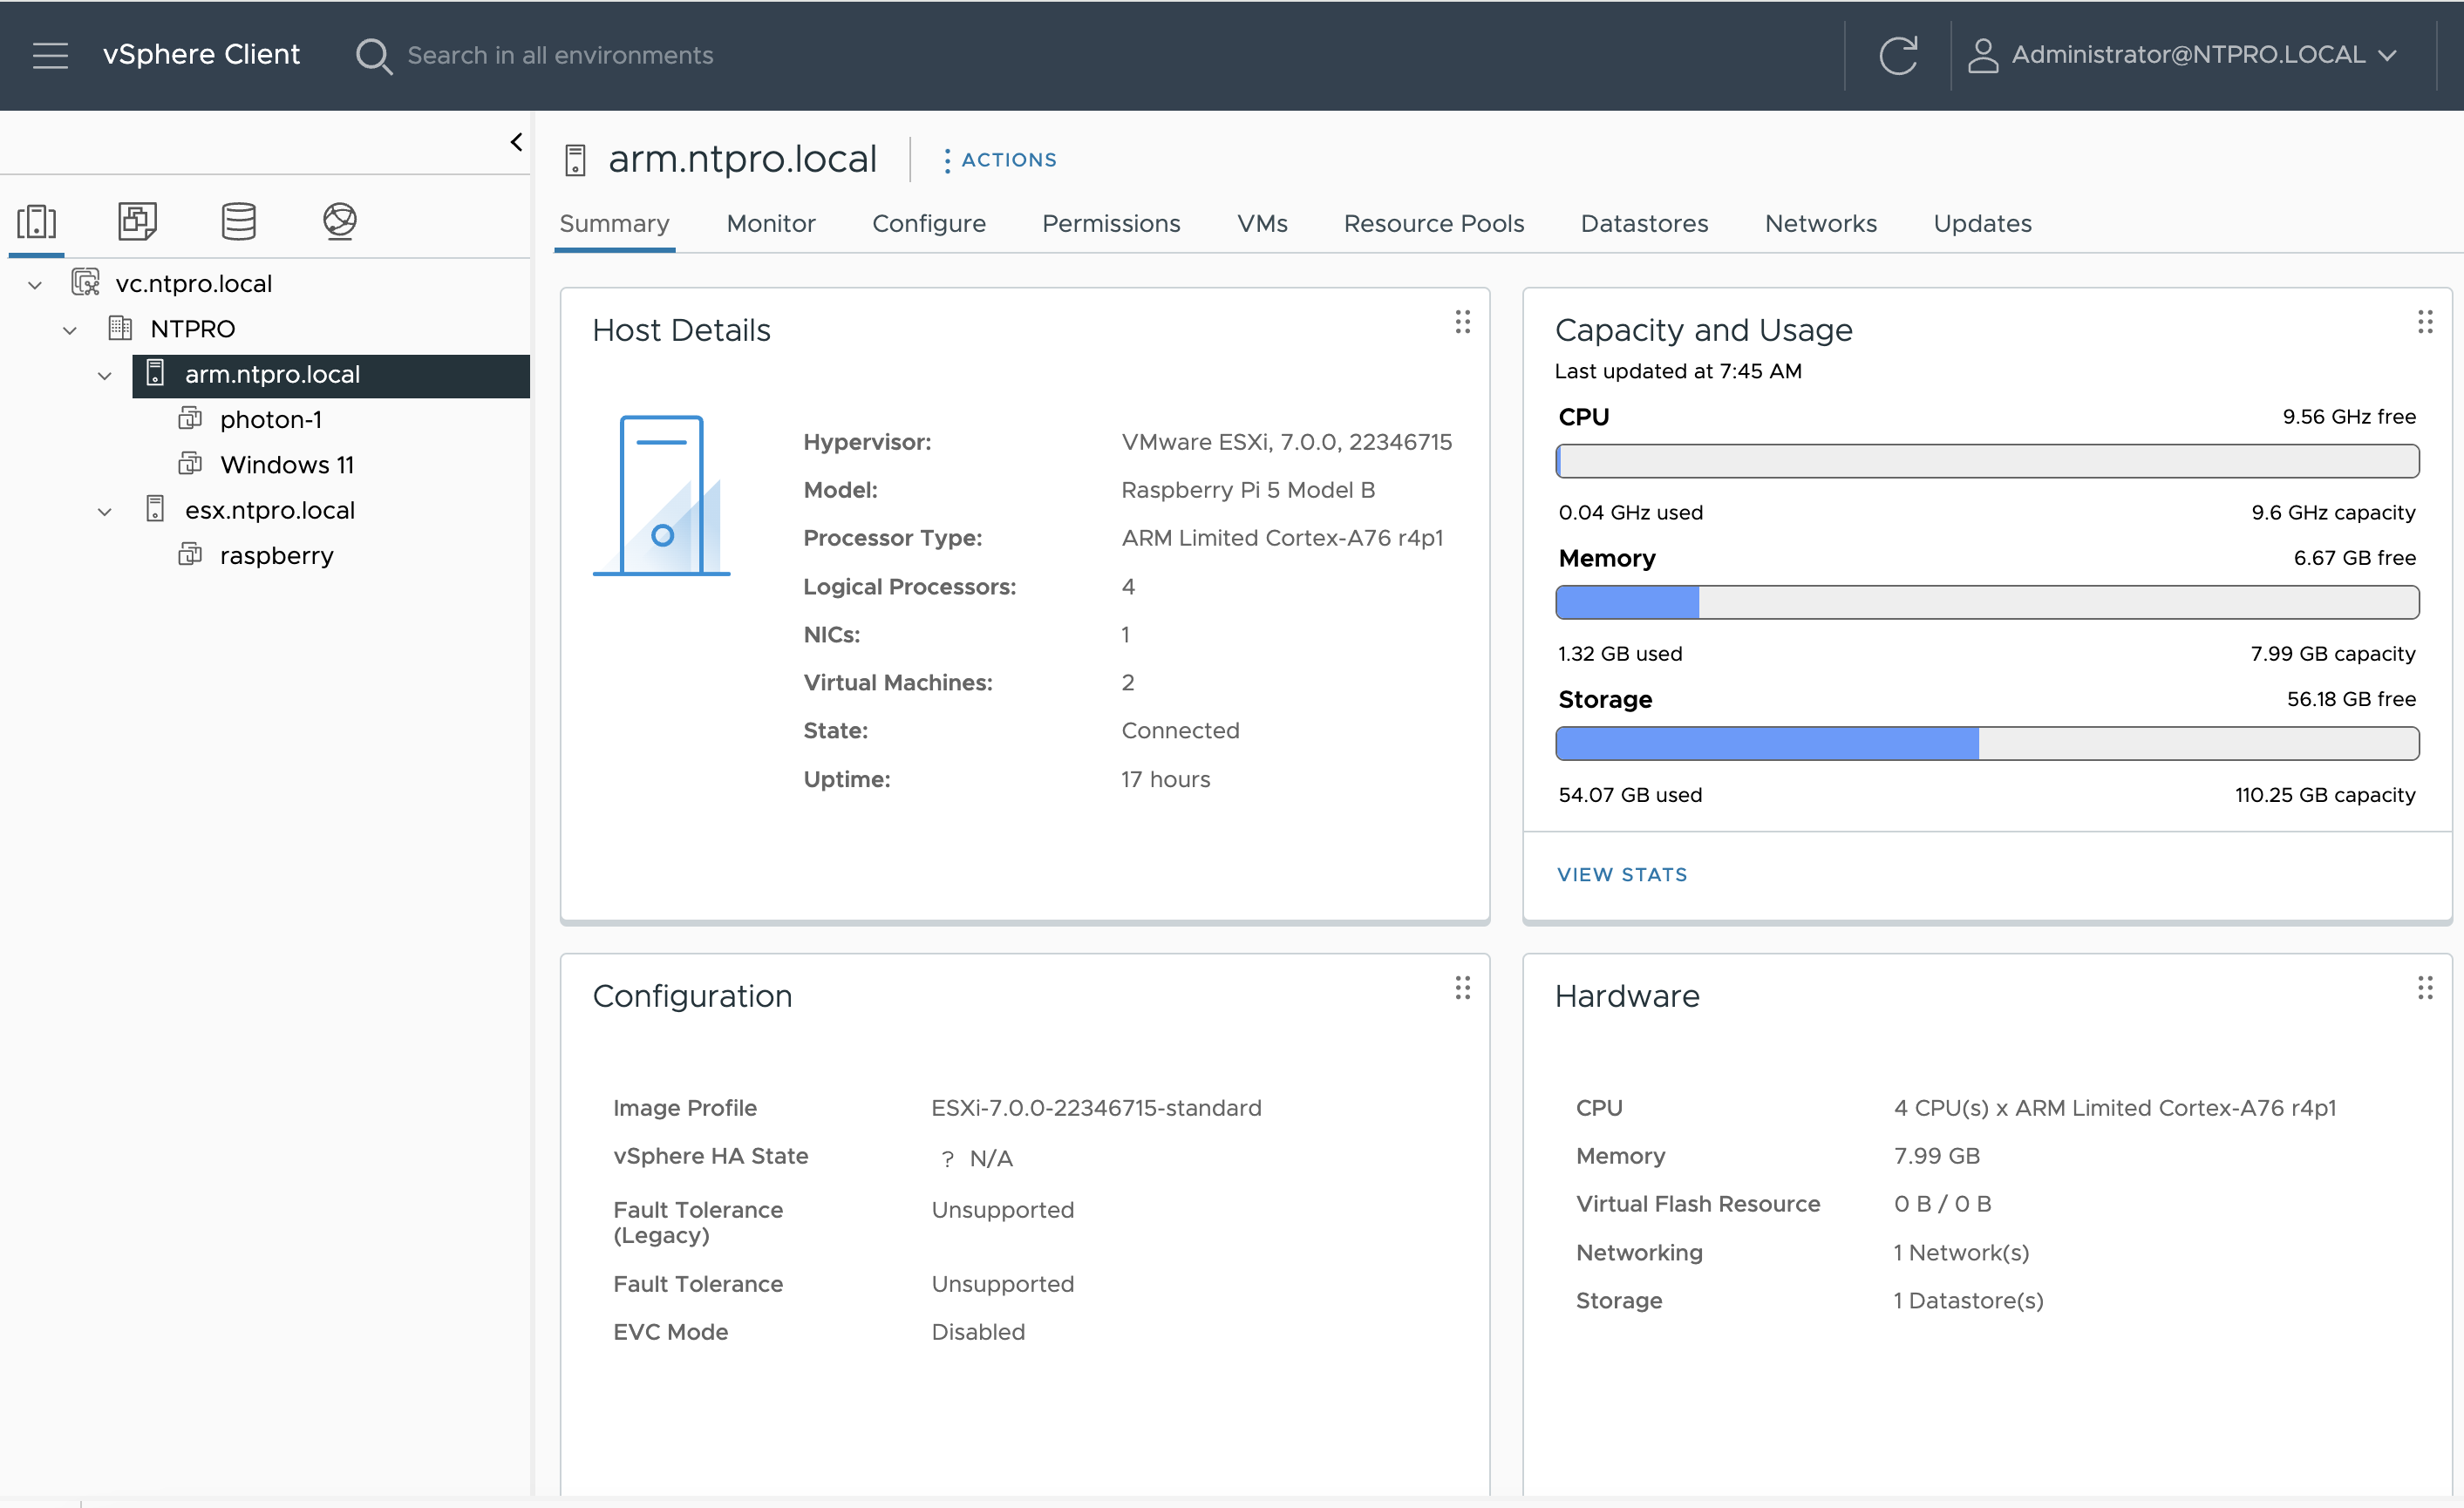
Once the installation is finalized, the next step is to start running virtual workloads. My first action was to set up a Photon virtual machine; VMware conveniently provides an ARM-compatible OVA file. The process is hassle-free, since I'm using Virtual Center to manage the ARM-based ESXi host—just a few clicks and the virtual machine springs to life.

The subsequent hurdle was setting up a Windows environment. Locating an ARM-compatible Windows ISO proved challenging, but after a diligent search, I found one. I uploaded the ISO to the local data store and configured a Windows VM. The installation of Windows was time-consuming, and the initial startup was even more prolonged. Eventually, a blue screen error interrupted the process, which requires further investigation.
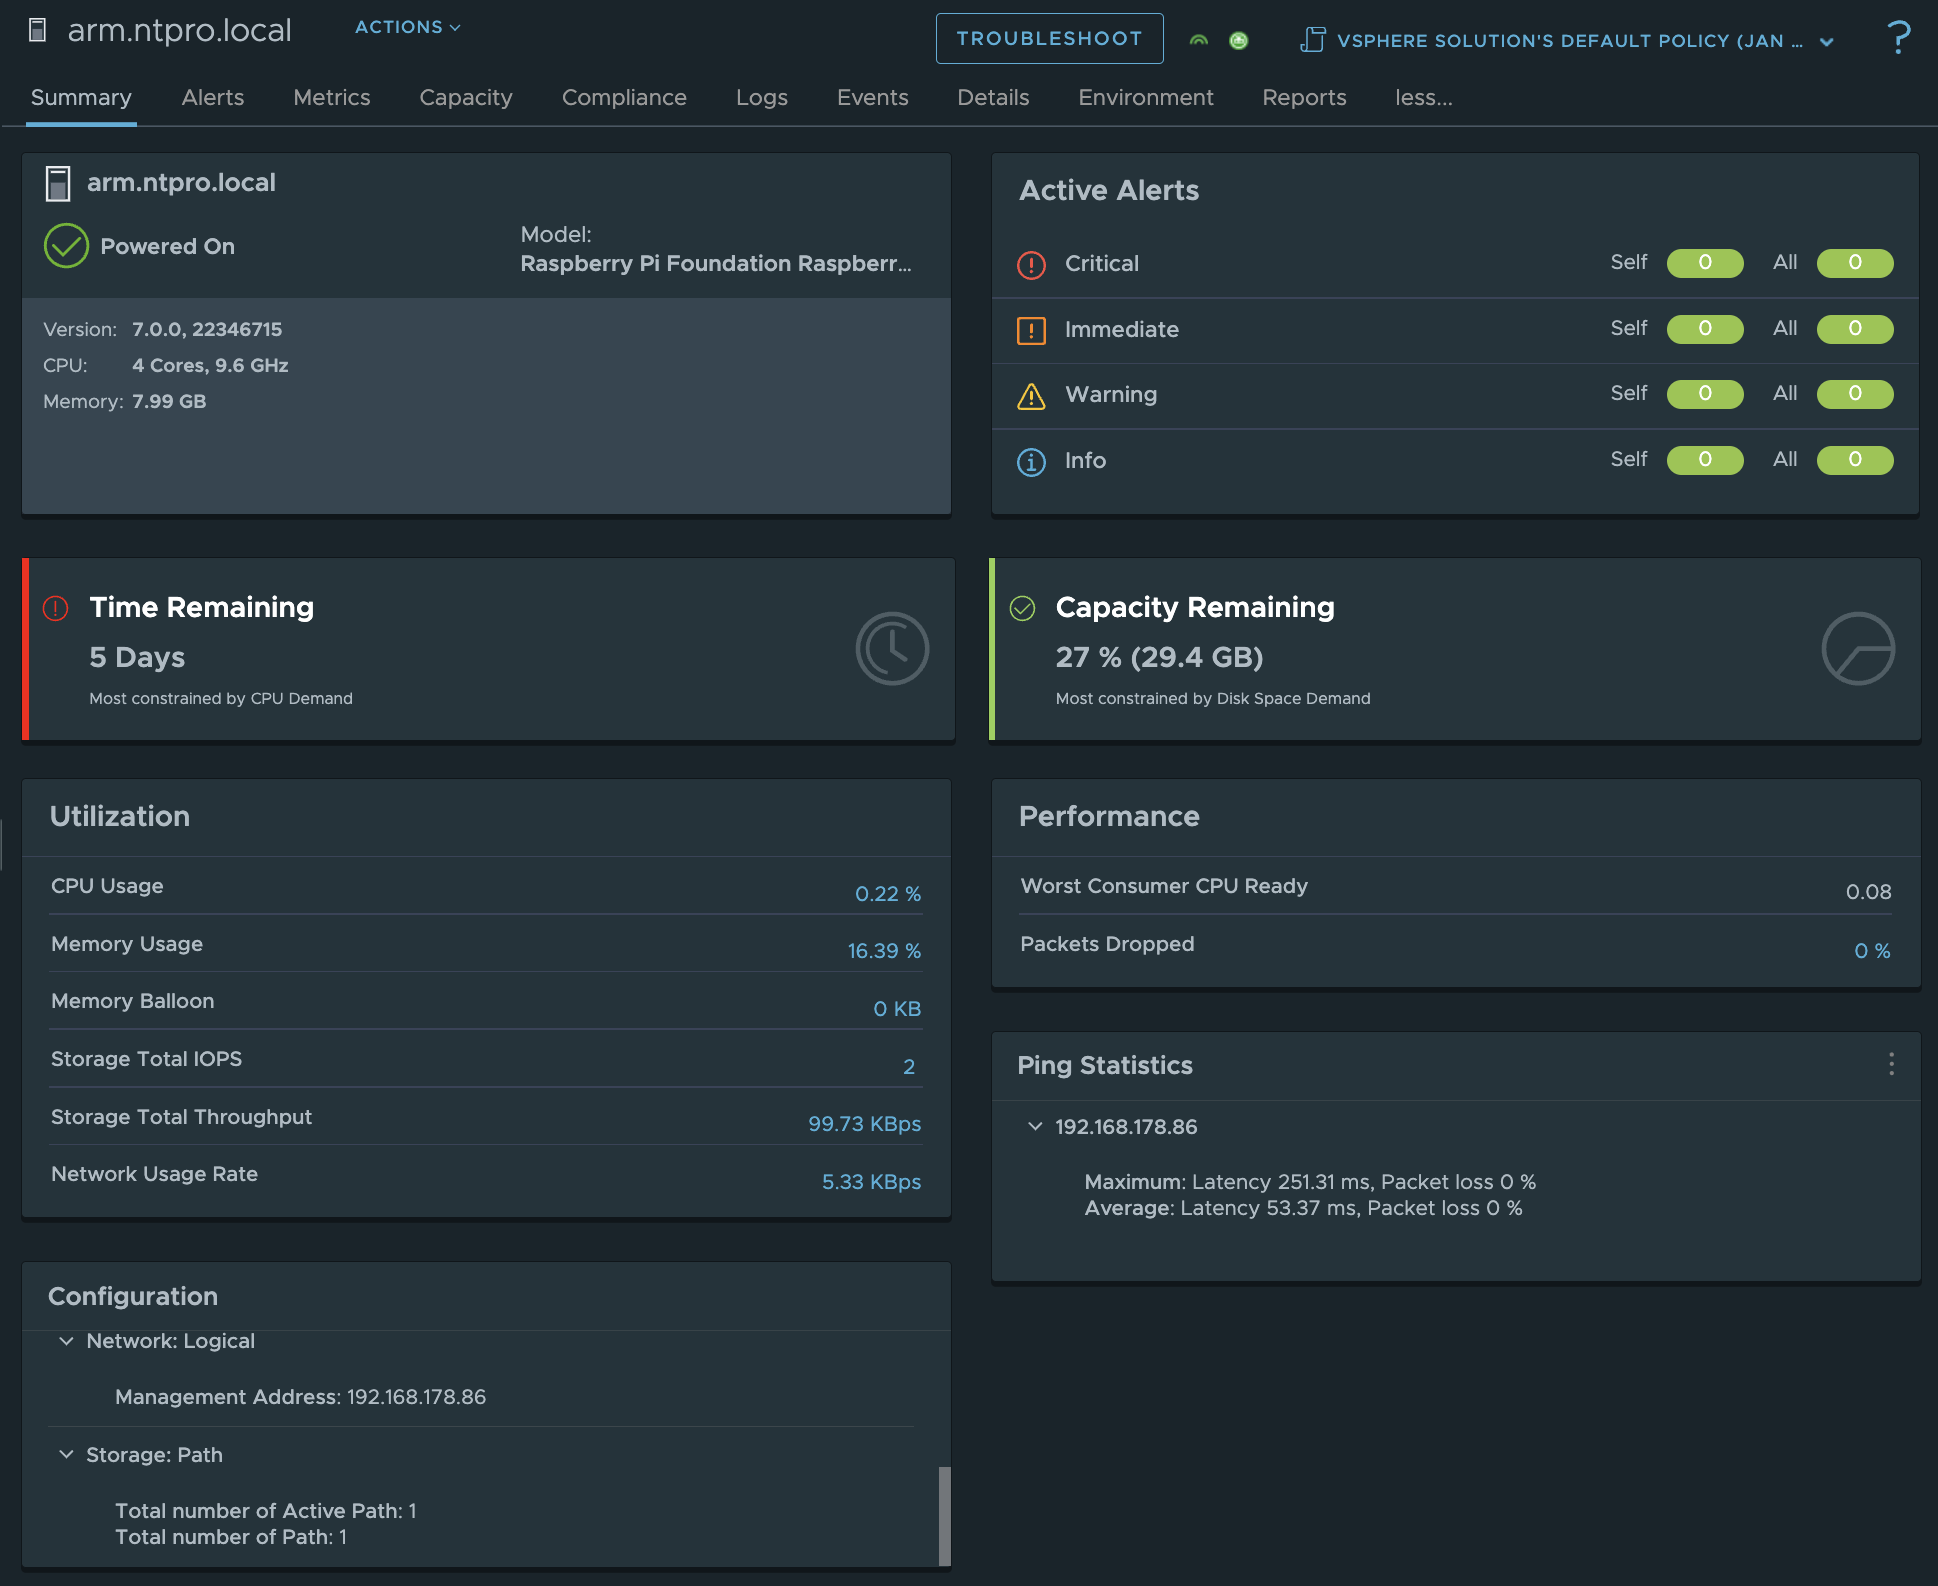
Initially, I operated on a Raspberry Pi 5 with 4 GB of RAM, but soon transitioned to a more robust 8 GB model to accommodate additional VM workloads. Monitoring of the vCenter server is conducted through Aria Operations, which allows me to keep an eye on the ESXi ARM host and virtual machines via comprehensive dashboards. I've also set up Aria Operations for log management, simplifying the troubleshooting process.
In summary, the article showcases the advancements and challenges in setting up and running ESXi ARM on the Raspberry Pi 5. It highlights the technical requirements, the setup process, and the potential for hosting various virtual workloads, along with the importance of continuous monitoring and system optimization. Special thanks to Jimmy van der Mast for providing technical expertise.


