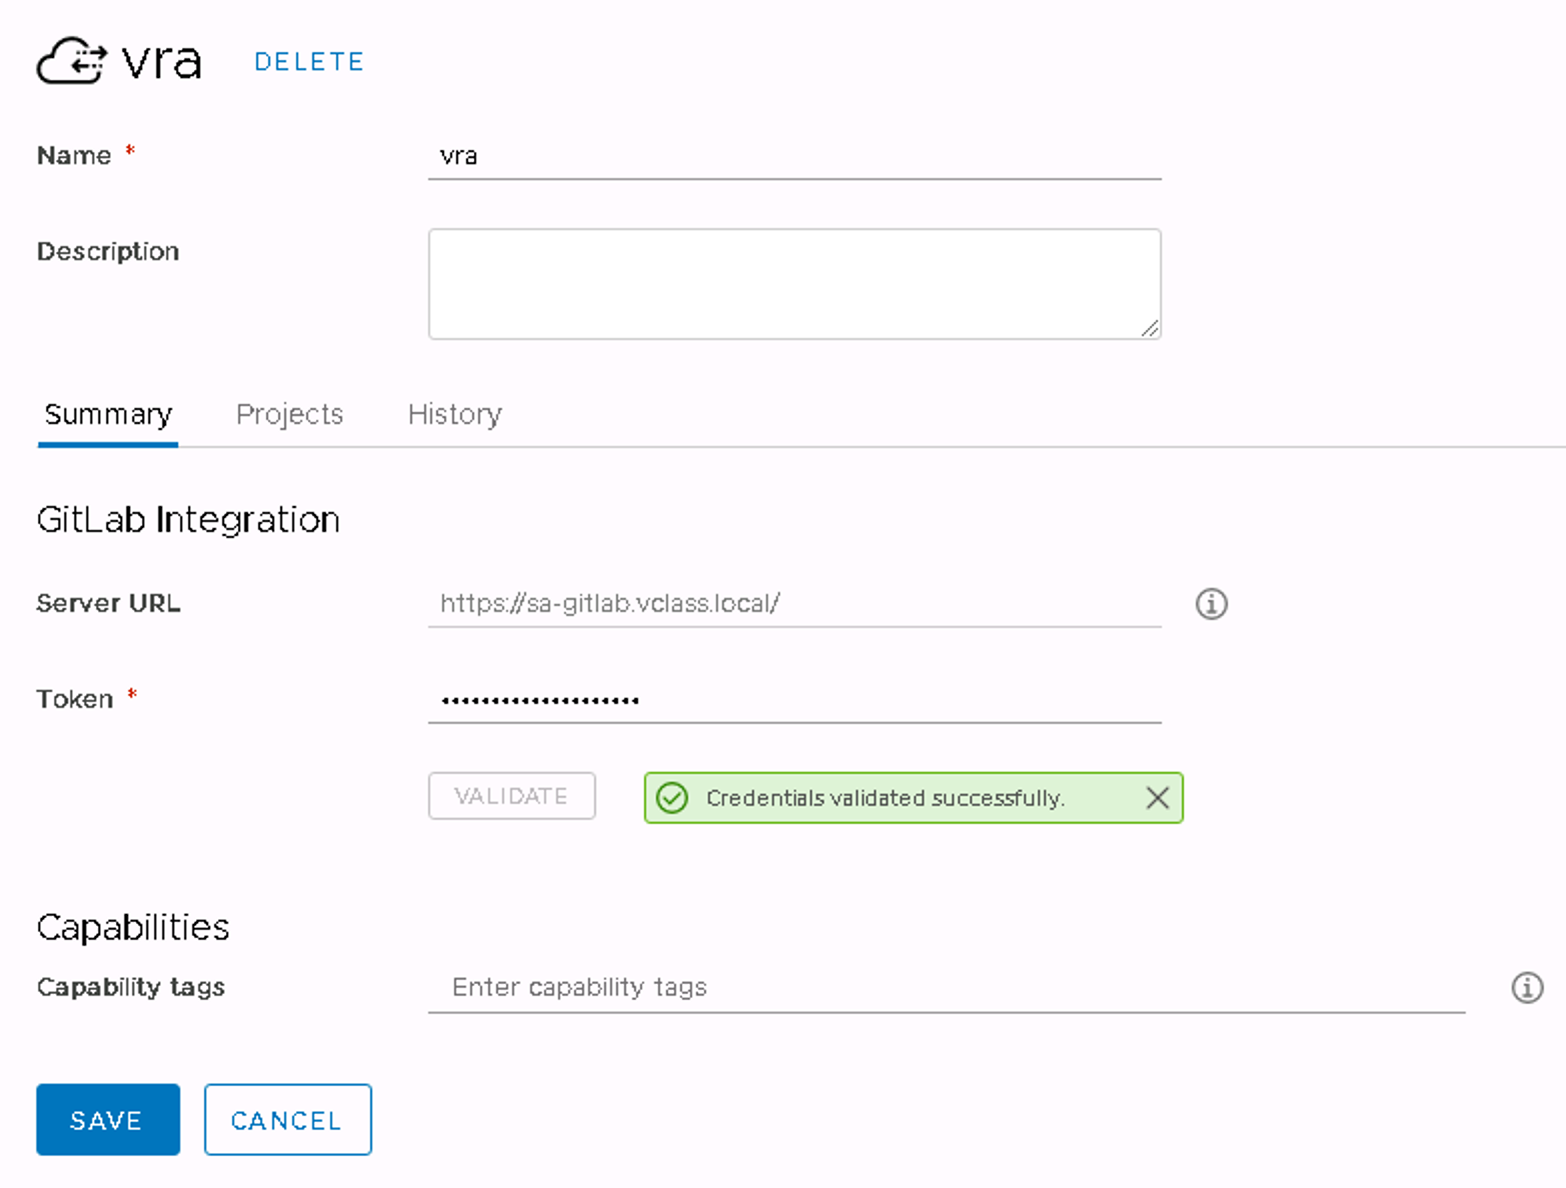
This article describes how to configure GitLab and Action Based Extensibility Inside Cloud Assembly. The first thing to do is go to infrastructure integrations and configure GitLab Integration by specifying the URL to your GitLab server (private or public) and use the generated api token from you GitLab settings.
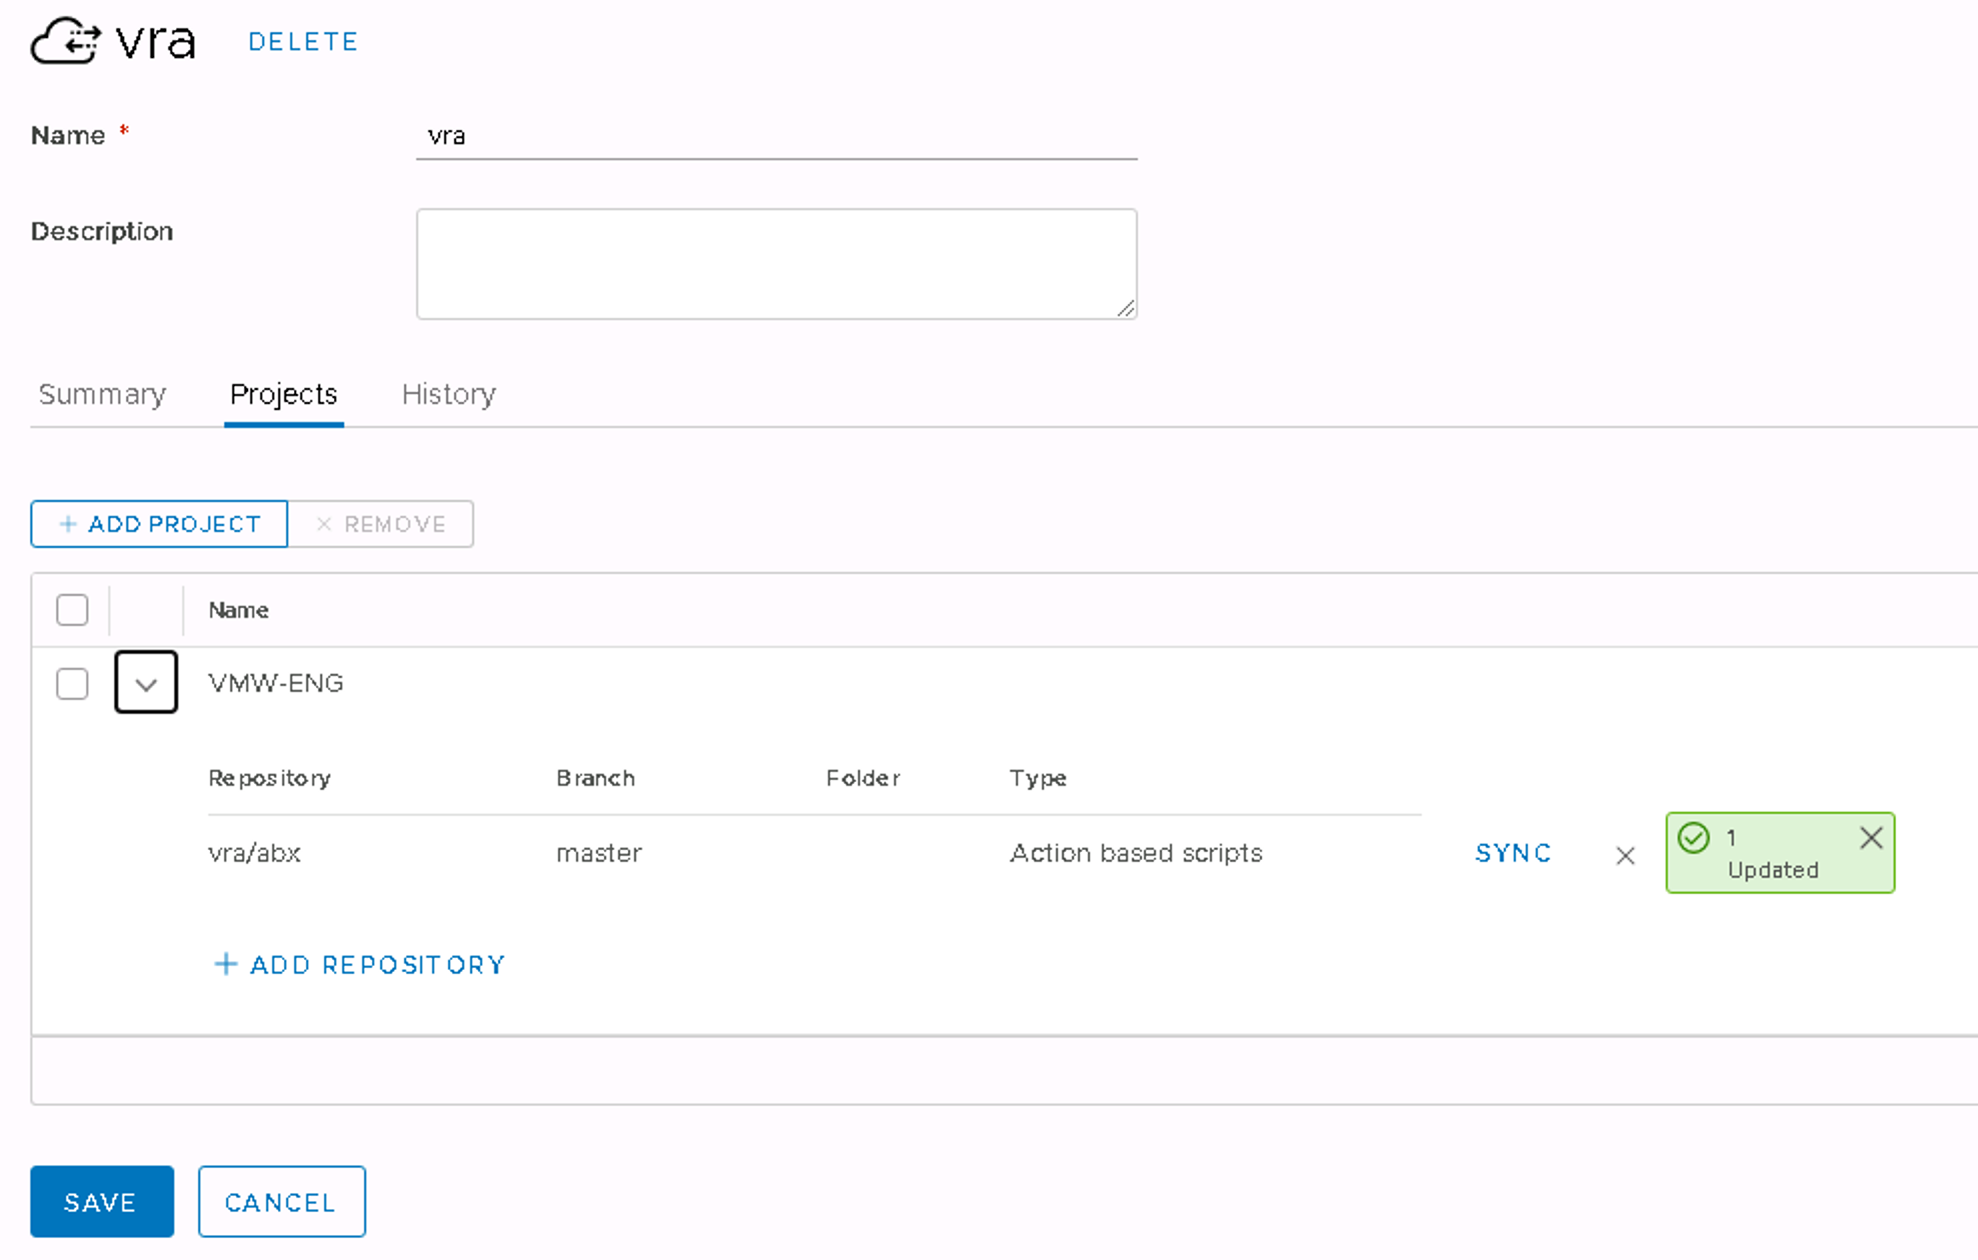
The next step is assigning the repository to a Project. Select an existing project and specify the following settings:
- Repository: vra/abx (vra is my GitLab username and abx is my GitLab project)
- Branch: Master
- Folder: Empty, this can be used when you have created an actions directory in you GitLab project
- Type: Action based scripts
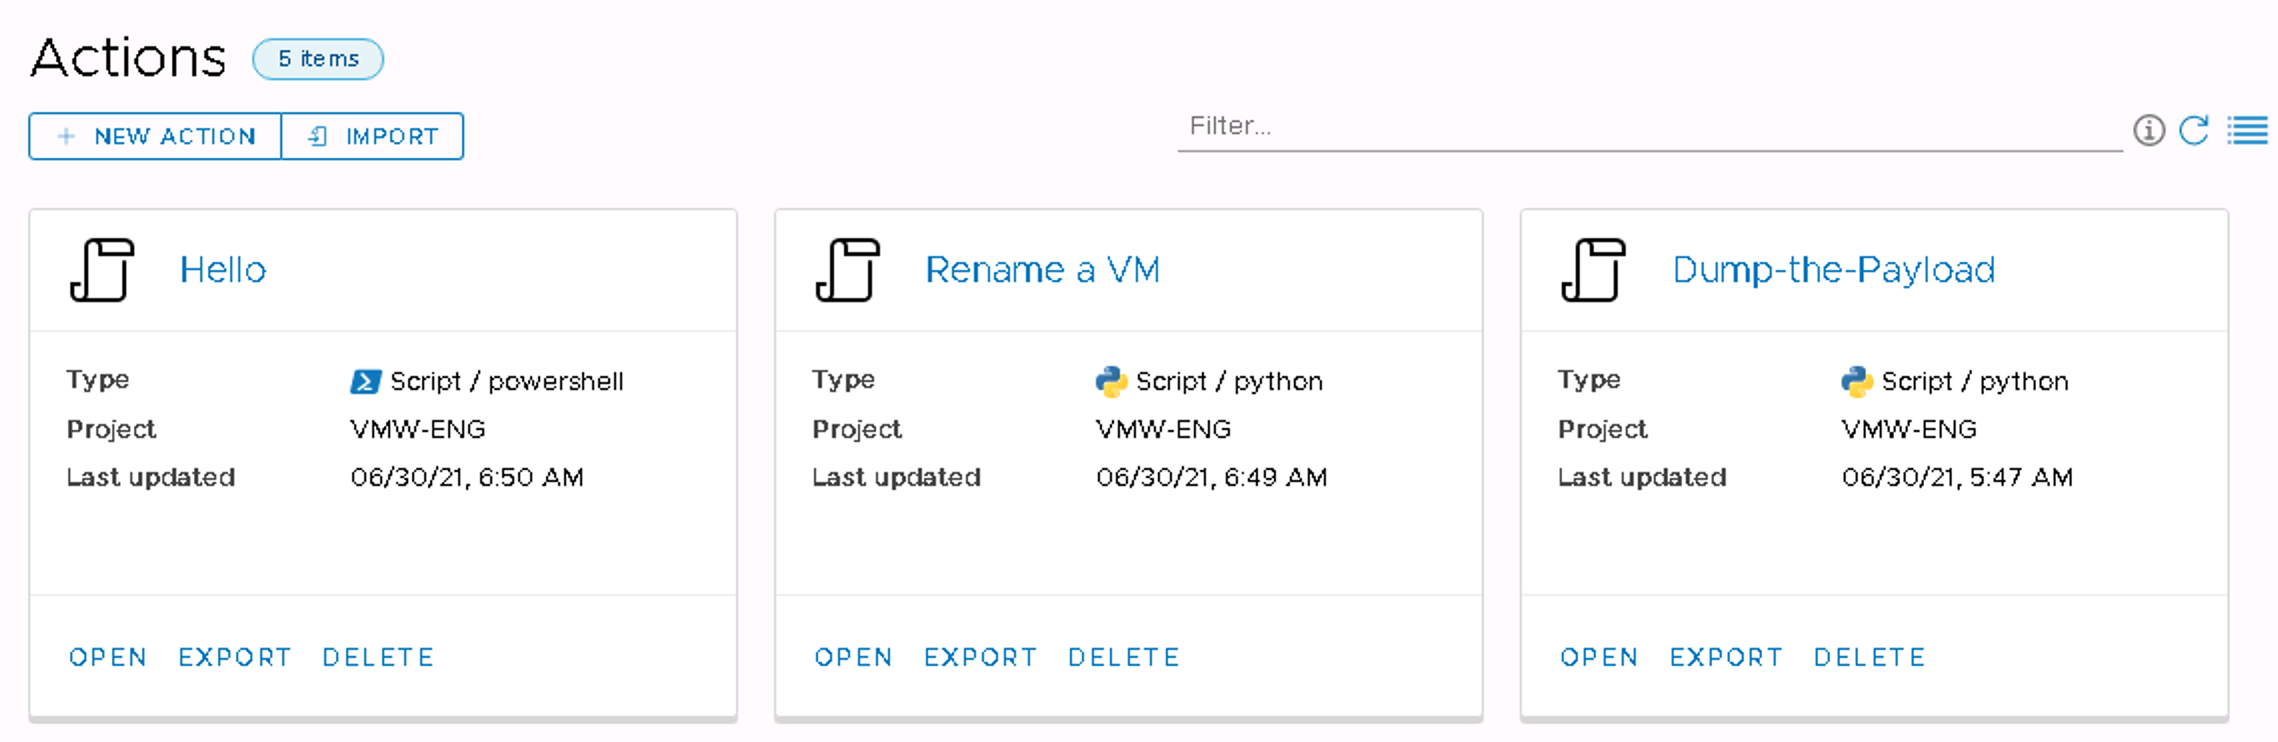
You can export ABX actions from vRealize automation and upload them to Gitlab manually, just make sure you extract both the script file and the ABX file from the ZIP file and upload both files with the same name.
Hello.abx
---
exportVersion: "1"
exportId: "8a74800a7a4d348d017a56f671c70006"
name: "Hello"
runtime: "powershell"
entrypoint: "handler"
inputs:
  target: "World"
timeoutSeconds: 180
deploymentTimeoutSeconds: 600
actionType: "SCRIPT"
configuration:
  const_azure-system_managed_identity: false
memoryInMB: 300
Hello.ps1
function handler($context, $payload) {
  Write-Host "Hello World" $payload.target

  return $payload
}
However, there is an easier way, simply open an existing action in Cloud Assembly and create a new version. This will automatically upload the action to GitLab.
After a successful sync the files are available in GitLab.